Here you can access the midi file library included in AD2, as well as any other MIDI files you want to use with it. You can search for beats in various ways like “by Category” or “by name”, or even by the desired pattern using the Grid Search feature.
Once you have found a beat you like, you can tweak it in a multitude of ways using the Beat Transformer.
When ready, just drag’n’drop the file directly into your song/arrangement. You can drag directly from the name, in the list or in the bottom info pane.
- Library column
- Filters
- Grid Search (can be folded in/out)
- Main Beat List
- Variant List
- Beat Transformer
- Beat Info
- Record MIDI
- Mark first beat in host
- Beats Shortlist
Library Column
Select to view and search All MIDI Files, or narrow it down to a certain MIDIpak, or Favorites (nice beats and fills that you have favorited previously).
If you have a collection of 3rd party MIDI files, they can be used as well.
- Click “Open External MIDI folder…” in the top menu
- Place your MIDI files in the “External MIDI files” folder
- Click “Refresh MIDI Library” in the top menu
- Your files should now show up under “EXTERNAL MIDI” in the list
💡Check out the PowerMap Engine article to make the most use of external MIDI files with different mapping, like GM.
Filters
Search for beats by using the list in the left hand column, and/or the Style, Tempo or Time Signature dropdowns. You can also search by name, and narrow your search by selecting to show Beats or Fills or both.
The Tempo dropdown allows you to narrow your search to beats that were originally made in a tempo close (+/- 10% or 20%) to the currently set tempo. This usually provides search results that feel more realistic, as drummers tend to do different things at different tempos.
Grid Search
If you’re looking for a specific kick/snare pattern, Grid Search is a very quick way to find matching beats. The grid represents 1 bar of 16th notes - just “paint” in the drum hits you’d like to search for. The yellow circles represent your searched hits. Try the Preset A-D buttons as a starting point!
Another way to create a Grid Search pattern is to start with All Off, select a beat you like from the list or an ExploreMap, and then hit the Similar button. Now the beat you picked will be made into a search pattern, and hopefully result in similar beats being listed below.
Each lane in the Grid Search can be turned on or off to include/exclude it from the search.
To narrow things down even more, the Snare lane can be switched to Sidestick. The Hihat lane can be switched to Open Hihat or Ride.
The default mode for a lane is that it is used to search, but by clicking Replace, the lane actually becomes a grid sequencer and the hits you paint completely replace the notes in the playing midi file. Now you can force a specific kick pattern on any beat in AD2 for example.
The ‘dots’ in the grid can look a bit different. In the default Search mode they can look like this:
- Yellow circle with green dot: success - there is a matching hit in the current beat
- Yellow circle: a hit that is searched for but not found in the current beat
- Green dot: a hit that exists in the current beat that was not searched for
In Replace mode the hits in the current beat are not used for playback but it can still be interesting to see what the original pattern looks like. The dots can look like this:
- Green rhombus with dot: there is a matching hit in the current beat
- Green rhombus: there is no matching hit in the current beat
- Gray rhombus: a hit that exists in the current beat but not in the replaced beat
In Search&Replace mode you are both searching for a pattern AND replacing it. Brain melt! Here’s an example: Say you paint a “four on the floor” kick pattern with this mode active. You are now searching for matching beats so your results will be files that have kick patterns similar to this. BUT you are also replacing whatever is in the file with your strict “painted in” pattern. The idea is that these beats are probably good matches since they had a similar pattern to begin with. The rest of the beat (snares, hihats etc) will likely be disco rather than metal in this example.
Main Beat List
This is where all your search results will be listed. Selecting a beat here reveals one or more variants of that beat in the Variant List.
Variant List
All the variants of the beat you have selected will be shown here. You can click the small heart to the right to mark a variant as a Favorite, and list all your Favorite beats by choosing Fav Beats
Beats Shortlist
As you browse around, drag the beats/fills you like to the Shortlist. From there it's easy to audition the chosen beats as your song plays. Drag the best ones into your project. The Shortlist is saved with your current project/session.
Beat Transformer
The Beat Transformer is a powerful tool to change your selected beat. A little, or a lot - play around with it and see where you end up.
You can turn each section on/off to compare to the original, The Beat Visualization shows you how the beat is affected.
The Range control lets you compress, expand and/or shift the velocity range of your beat.
The Accents knobs are a creative way of applying accents (positive and negative) to your beat.
The Random knobs lets you apply slight randomness to the Timing or Velocity separately. Can add some “live” human feel to stiff beats.
The Kit Piece Mix & Reassign section has a slider to control the velocity level of each kit piece, while Mute and Solo are helpful in isolating the parts you’re interested in (like browsing only hihats from all the beats). The Reassign feature lets you swap out articulations: you could replace a normal snare hit with a sidestick for example.
At the bottom there are controls for the Speed (half tempo, double tempo and other useful things) and Length of your beat.
Finally, there is a Reset All button so you can revert to where you started from if things get a little out of whack!
Beat Info section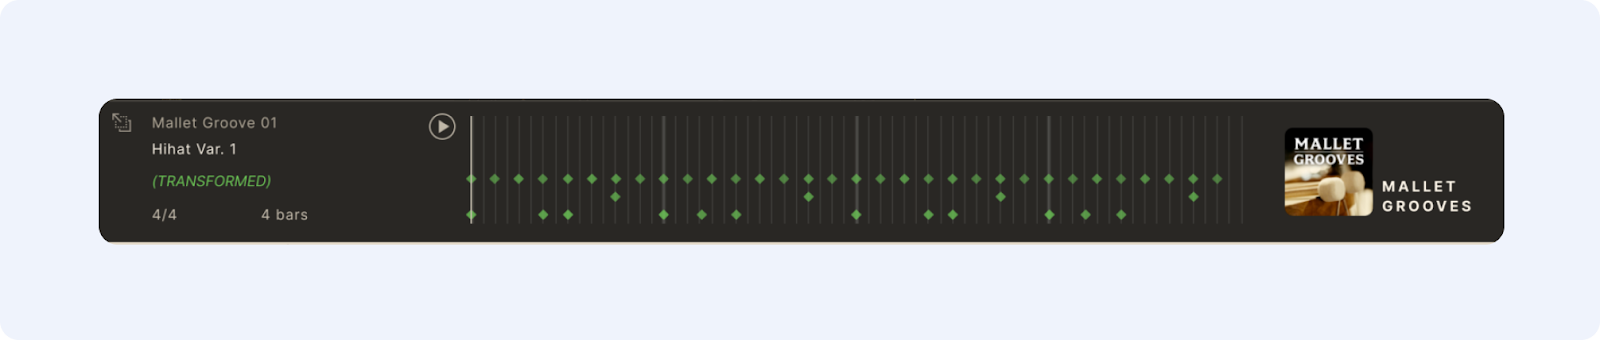
This section always shows info about the currently selected midi file, like its name, length and time signature.
The Beat Visualization in the middle provides a visual representation of the beat, with a marker that follows along as it plays (you can also click to play from any position). There’s a Play button down here too, for convenience. If you use the Transform controls you can see the visualization update in real time.
On the right hand side you can see which MIDIPak or library the beat comes from.
Record MIDI & Mark First Beat
The Record MIDI button can record straight from your e-drum kit, but also from the AD2 track in your DAW. By using the “cycle” feature in your DAW when recording a beat into AD2, the recorded beat will be nicely cut and looped. Your recorded midi beats will then appear under Recorded MIDI in the Library list on the left hand side.
Mark First Beat lets you “re-sync” where a beat starts, to align with your arrangement (example: AD2 plays the 2nd bar in a 4 bar pattern when your chorus starts and you want it to play the 1st bar there - just stop playback, click Mark First Beat and then click where you want the 1st bar to start in your DAW timeline)